There’s something about crispy chicken that just feels like home. That crunch when you cut into it, the juicy meat inside, the golden crust you can’t stop picking at. The only problem is that most of us don’t want to stand over a pot of hot oil on a Tuesday night.

That’s exactly why this baked buttermilk chicken has become one of my go-to weeknight dinners. It gives you all the comfort of classic Southern fried chicken with none of the splatter, the leftover oil, or the lingering smell in your kitchen. The oven does the hard work, and a quick blast under the broiler gives you a crust so golden that nobody at the table will guess it was baked.
The secret is two simple things: a short soak in tangy buttermilk and a crunchy, seasoned panko coating. That’s it. No marinating overnight unless you want to, and no special equipment beyond a baking sheet.
If you love easy oven chicken dinners, you’ll also want to bookmark my collection of Baked Chicken Breast Recipes. There’s something in there for every night of the week.
Why You’ll Love This Recipe
- Crispy without frying. Panko breadcrumbs plus a final broil give you real crunch using a fraction of the oil.
- Juicy every time. Buttermilk keeps the chicken tender and moist, even the lean breast meat.
- Best of both worlds. Using a mix of breasts and thighs means everyone gets their favorite, white meat or dark.
- Simple pantry spices. Oregano, garlic powder, cayenne, and salt are all you need for big flavor.
- Hands-off cooking. Once it’s in the oven, you’re free to make a side or set the table.
- Family-friendly. It feeds six, so it’s perfect for busy weeknights or casual Sunday dinners.
Why Buttermilk Makes Such a Difference
If you’ve ever wondered why so many Southern chicken recipes start with a buttermilk soak, here’s the short answer. Buttermilk is mildly acidic. That gentle acidity works on the surface of the chicken, softening the proteins so the meat stays tender and juicy as it cooks. Stronger marinades like lemon juice or vinegar can turn chicken mushy. Buttermilk is mild enough that it tenderizes without ruining the texture.
It also does a second, less obvious job. Buttermilk is thick and slightly sticky, so it acts like glue for the coating. Mixed with an egg, it helps the panko cling to every piece, which means more crunch in every bite and less coating left behind on the pan.
In this recipe, a quick 15-minute rest in the buttermilk mixture is enough to make a difference. But if you have time, you can let the chicken soak in the fridge for a few hours, or even overnight. The longer it sits, the more tender and tangy the result.
Ingredients You’ll Need
Here’s what goes into this easy baked chicken:
For the chicken:
- 3 boneless, skinless chicken breasts: lean, mild, and a great canvas for the crispy coating.
- 3 boneless, skin-on chicken thighs: richer and juicier, with skin that crisps up beautifully under the broiler.
- Salt and pepper: to season the chicken before soaking.
For the buttermilk soak:
- ½ cup (120 ml) buttermilk: the key to tender, flavorful chicken.
- 1 egg, beaten: helps the coating stick.
For the crispy coating:
- 2 cups panko breadcrumbs: for a light, extra-crunchy crust.
- 1 teaspoon dried oregano: adds an herby, slightly earthy note.
- 1 teaspoon garlic powder: gives savory depth in every bite.
- ½ teaspoon sea salt: seasons the coating itself.
- 1 teaspoon cayenne pepper: a gentle warmth. Reduce it or skip it for a milder version.
You’ll also need: cooking spray or oil for greasing the pan and misting the chicken.
Why Panko Instead of Regular Breadcrumbs?

Panko is a Japanese-style breadcrumb. It’s made from crustless bread and processed into large, airy flakes rather than fine crumbs. Those bigger flakes absorb less moisture and stay crisp in the oven. That’s exactly what you want when you’re skipping the deep fryer. Regular breadcrumbs will work in a pinch, but the crust will be denser and less crunchy.
How to Make Baked Buttermilk Chicken, Step by Step
Step 1: Preheat the oven
Heat your oven to 410°F (210°C). A hot oven is essential. It sets the coating quickly so it crisps instead of steaming.
Step 2: Season and soak the chicken
Put the chicken breasts and thighs into a large bowl and season them with salt and pepper. Pour in the buttermilk and the beaten egg. Toss everything together until each piece is fully coated. Let it sit for 15 minutes while you get the coating ready.
Tip: If your chicken breasts are very thick, pound them to an even thickness first, or slice them in half horizontally. Evenly sized pieces cook at the same speed, so nothing ends up dry while something else is still underdone.
Step 3: Mix the coating
In a separate bowl, combine the panko breadcrumbs, oregano, garlic powder, sea salt, and cayenne pepper. Stir so the spices are evenly distributed through the crumbs.
Step 4: Grease the baking sheet
Generously grease a large baking sheet with cooking spray or a thin layer of oil. Don’t skip this step. It helps the bottom of the chicken crisp and stops the coating from sticking and tearing off.
Step 5: Coat the chicken
Lift the chicken pieces out of the buttermilk one at a time, letting the excess drip back into the bowl. Press each piece into the panko mixture, turning to coat all sides. Press firmly so the crumbs stick. Arrange the coated pieces on the baking sheet with a little space between them.
Once they’re all on the tray, give the tops a good spray of cooking spray. This small amount of oil is what helps the panko turn golden brown instead of pale and dry.
Step 6: Bake, flip, and bake again
Bake for 12 minutes. Then carefully flip each piece with a thin spatula, trying not to disturb the crust, and bake for another 10 minutes.
Step 7: Broil for the golden finish
Switch the oven to broil and cook the chicken for about 5 minutes, until the crust is deep golden and crisp. Watch closely during this step, because broilers vary a lot and panko can go from golden to burnt in under a minute.
That golden color isn’t just for looks. It comes from the Maillard reaction, the same browning process that gives toast, seared steak, and fried chicken their rich, savory flavor.
Step 8: Check the temperature and rest
The chicken is done when an instant-read thermometer inserted into the thickest part reads 165°F (74°C). Take the tray out and let the chicken rest for about 2 minutes before serving. This short rest lets the juices settle back into the meat.
Breasts, Thighs, or Both?
This recipe uses a mix of boneless, skinless breasts and boneless, skin-on thighs, and I love it that way. The breasts are lean and slice neatly. The thighs bring extra richness and stay incredibly juicy. Everybody gets to pick their favorite.
That said, you can absolutely use just one cut:
- All breasts: Pound them to an even thickness and keep a close eye on the temperature so they don’t dry out.
- All thighs: These are the most forgiving and almost impossible to overcook. They may need a couple of extra minutes.
- Chicken tenders: Reduce the baking time to about 8 minutes per side, then broil briefly.
Whichever you choose, the thermometer is your best friend.
Easy Variations
Once you’ve made the classic version, try switching up the coating:
- Parmesan crust: Replace ½ cup of the panko with finely grated Parmesan for a cheesy, nutty flavor. If you love that combination, my Garlic Parmesan Chicken is right up your alley.
- Smoky paprika: Swap the cayenne for smoked paprika for a milder, barbecue-style flavor.
- Italian herb: Use an Italian seasoning blend in place of the oregano.
- Lemon pepper: Add lemon zest and extra black pepper to the panko for a bright, zesty twist.
- Extra spicy: Add a splash of hot sauce to the buttermilk and bump the cayenne up to 1½ teaspoons.
What to Serve with Baked Buttermilk Chicken
This chicken goes with just about anything, but here are a few of my favorite pairings:
- A crisp salad. A classic Caesar Salad balances the crunchy chicken with fresh, creamy, tangy flavor.
- A light, low-carb side. Lemon Garlic Cauliflower Rice keeps the meal lighter while still feeling satisfying.
- Mashed potatoes or sweet potatoes. It’s the ultimate comfort-food combo.
- Rice pilaf or buttered rice. Simple and perfect for soaking up any sauce.
- Roasted green beans or broccoli. They cook in the oven right alongside the chicken.
- Dipping sauces. Honey mustard, ranch, or a spicy mayo all work beautifully.
Craving a sweet and savory chicken night instead? Try my Honey Garlic Chicken next.
How to Store and Reheat
Refrigerator: Let the chicken cool completely, then store it in an airtight container in the fridge for up to 3–4 days.
Freezer: Wrap the cooled pieces individually, or freeze them on a tray until firm, then transfer to a freezer bag. They’ll keep for up to 3 months. Thaw overnight in the fridge before reheating.
Reheating: For the crispiest results, reheat in the oven at 375°F (190°C) for 10–15 minutes, or in an air fryer at 370°F (185°C) for 5–8 minutes. Avoid the microwave if you can, because it softens the panko crust.
Leftover ideas: Slice cold leftovers over a salad, tuck them into a wrap, or chop them into a quick chicken sandwich with lettuce and mayo.
Tips for the Crispiest Baked Chicken
- Don’t skip the grease. A well-greased pan crisps the bottom and keeps the coating in place.
- Spray the tops. A light mist of oil is the difference between golden and pale.
- Leave space between pieces. Crowded chicken steams instead of crisping.
- Press the panko on firmly. Loose crumbs fall off in the oven.
- Flip gently. Use a thin metal spatula and slide it under the crust.
- Watch the broiler. Stay close for those last 5 minutes.
- Use a thermometer. 165°F (74°C) is the target. Don’t guess.
- Try a wire rack. For all-over crunch, bake the chicken on an oven-safe rack set over the baking sheet so air circulates underneath.
Frequently Asked Questions
Can I marinate the chicken in buttermilk overnight?
Yes. The recipe only needs 15 minutes, but a few hours or overnight in the fridge makes the chicken even more tender and flavorful. Just cover the bowl and keep it chilled.
What can I use instead of buttermilk?
Make a quick substitute by stirring ½ tablespoon of lemon juice or white vinegar into ½ cup of milk. Let it stand for 5 minutes. Plain yogurt thinned with a little milk also works well.
Is this recipe spicy?
It has a gentle kick from the cayenne pepper. For a kid-friendly version, cut the cayenne to ¼ teaspoon or leave it out entirely.
Can I make this in an air fryer?
Yes. Coat the chicken the same way, spray it with oil, and air fry at 380°F (193°C) for about 18–22 minutes, flipping halfway, until it reaches 165°F (74°C) inside. Cook in batches if needed.
Why is my coating soggy?
The usual reasons are a crowded pan, not enough oil spray on top, or too much buttermilk left on the chicken. Let the excess drip off and give each piece room to breathe.
Can I use bone-in chicken?
You can, but it will take longer, often 35–45 minutes depending on size. Always go by internal temperature rather than time.
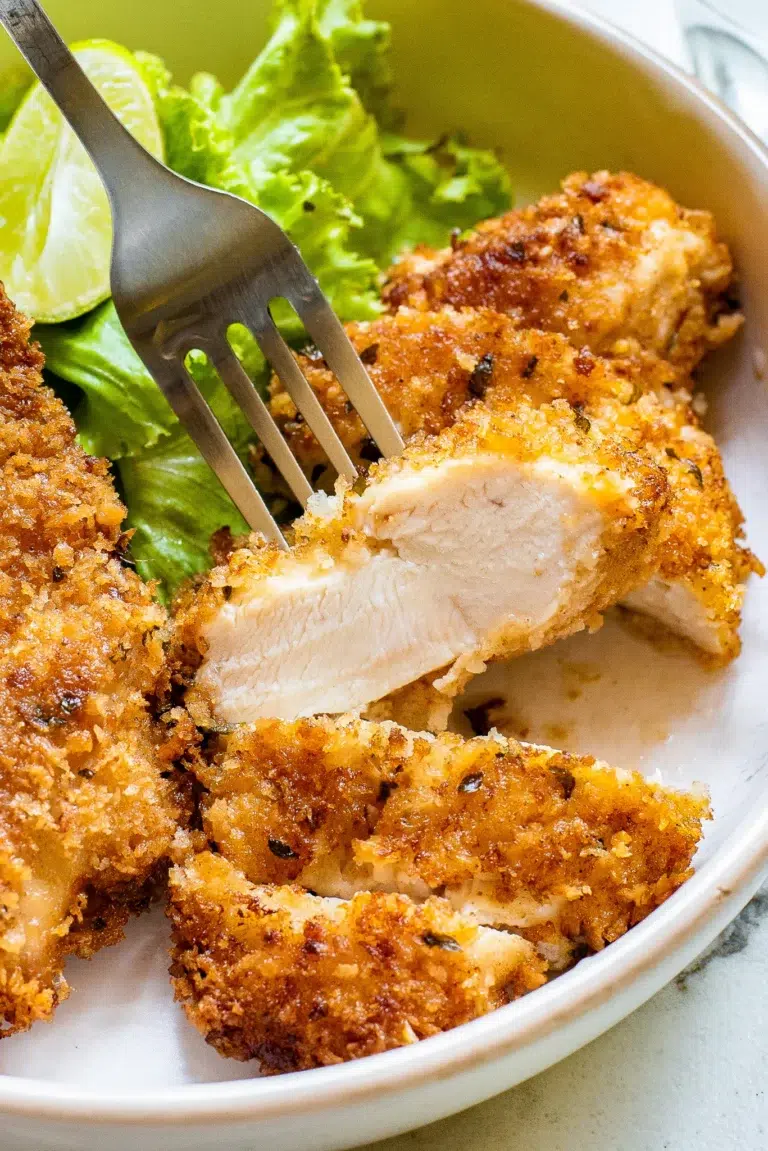
Crispy Baked Buttermilk Chicken (No Deep Fryer Needed!)
Crispy on the outside, juicy on the inside, and made entirely in the oven, this baked buttermilk chicken proves you don’t need a deep fryer for real comfort food. Give it a try this week, and let me know in the comments how your family liked it!
- Total Time: 47 minutes
- Yield: 6
Ingredients
- 3 chicken breasts, boneless and skinless
- 3 chicken thighs, boneless and skin-on
- Salt and pepper, to taste
- ½ cup (120 ml) buttermilk
- 1 egg, beaten
- 1 tsp dried oregano
- 1 tsp garlic powder
- ½ tsp sea salt
- 1 tsp cayenne pepper
- 2 cups panko breadcrumbs
- Cooking spray
Instructions
- Preheat. Heat the oven to 410°F (210°C).
- Soak. Season the chicken with salt and pepper in a large bowl. Add the buttermilk and beaten egg, toss to coat, and let it rest for 15 minutes.
- Make the coating. In a separate bowl, mix the panko, oregano, garlic powder, sea salt, and cayenne.
- Prep the pan. Grease a baking sheet generously.
- Coat. Let the excess buttermilk drip off each piece, then press it into the panko mixture until fully covered. Arrange on the baking sheet and spray the tops with cooking spray.
- Bake. Bake for 12 minutes. Carefully flip each piece, then bake for 10 more minutes.
- Broil. Broil for about 5 minutes, watching closely, until deep golden and crisp.
- Rest. Make sure the thickest part reaches 165°F (74°C). Rest for 2 minutes, then serve.
Notes
- Marinate longer, up to overnight in the fridge, for extra-tender chicken.
- Reduce or omit the cayenne for a mild version.
- Leftovers keep 3–4 days in the fridge. Reheat in the oven or air fryer for the best crunch.
Nutrition is an estimate and will vary with the brands and exact cuts used.
- Prep Time: 20 minutes
- Cook Time: 27 minutes
- Category: Main Course
- Method: Baked
- Cuisine: American