Cheesy Garlic Chicken Wraps aren’t just another quick dinner—they’re your new go-to comfort food, loaded with juicy seasoned chicken, gooey melted cheese, and a garlic punch that makes every bite unforgettable.
Wrapped in a warm, buttery-crisp tortilla, this recipe is everything you crave after a long day: fast, flavorful, and incredibly satisfying.
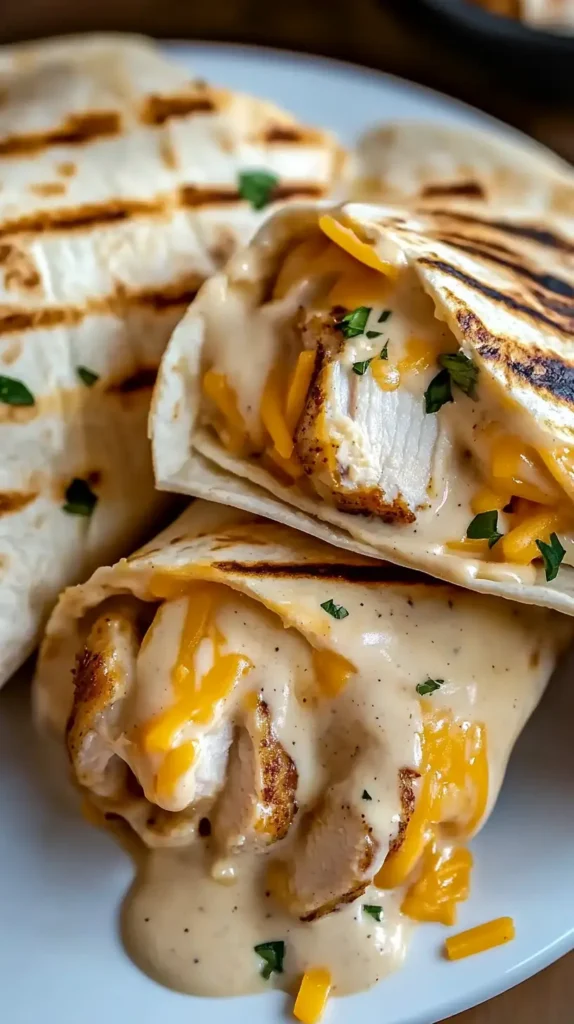
What makes these wraps truly irresistible? It’s the perfect balance of textures and flavors—crispy on the outside, creamy and savory on the inside. Whether you’re cooking for the family, meal-prepping for the week, or just treating yourself, this is one recipe that delivers comfort and flavor in every bite.
Stick around—I’ll show you exactly how to make these Cheesy Garlic Chicken Wraps step-by-step, plus pro tips and variations that take them to the next level.
Try this creamy Garlic Parmesan Chicken Pasta everyone’s loving!
Print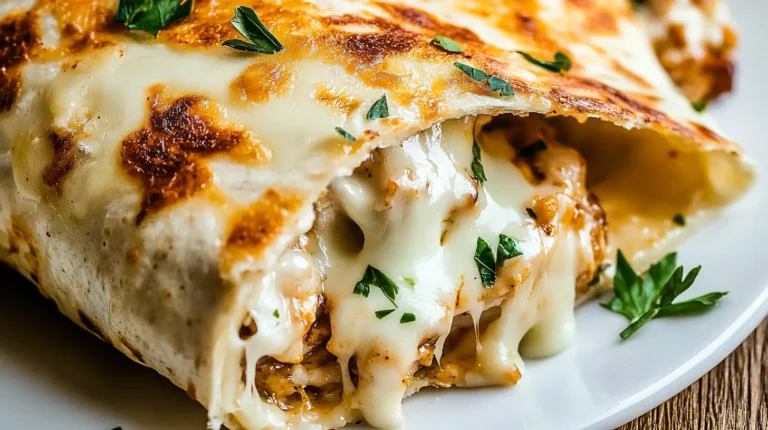
Cheesy Garlic Chicken Wraps
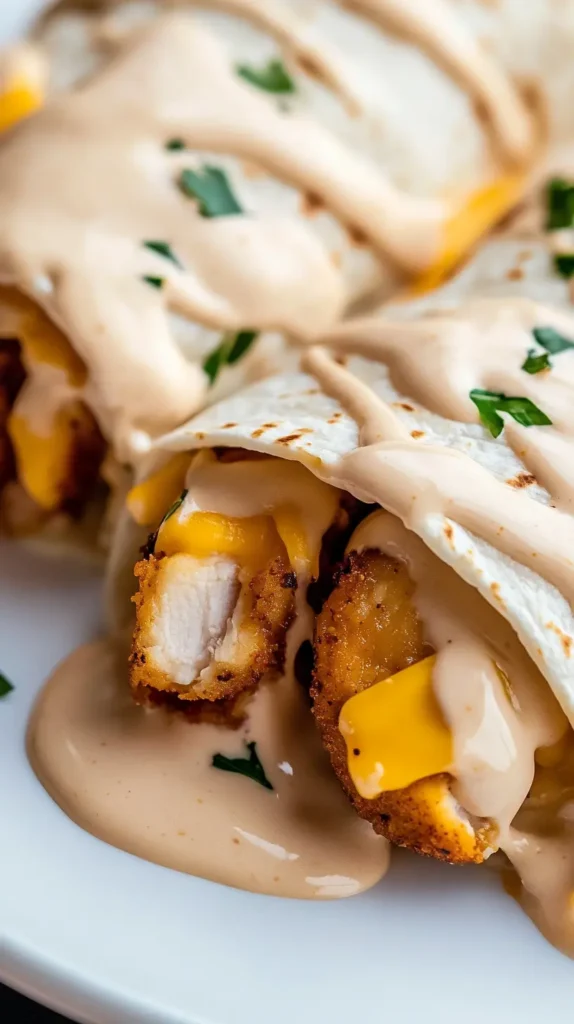
Enjoy our Cheesy Garlic Chicken Wraps, featuring tender chicken, creamy garlic aioli, and melted cheddar in a soft tortilla.
- Total Time: 33 minutes
- Yield: 4
Ingredients
Ingredients:
- 2 cups cooked chicken (shredded)
- 1/2 cup garlic aioli
- 1 cup cheddar cheese (shredded)
- 4 large tortillas
- Salt and pepper to taste
Instructions
Instructions:
- Mix Chicken: Combine shredded chicken with garlic aioli in a bowl. Season with salt and pepper.
- Assemble Wraps: Place chicken mix and cheddar cheese on each tortilla.
- Wrap: Fold tortillas tightly around the filling.
- Grill: Heat wraps in a skillet over medium heat until golden and cheese melts.
- Serve: Slice and enjoy warm.
Notes
Nutrition Information (per serving):
- Calories: 450
- Fat: 18g
- Saturated Fat: 7g
- Cholesterol: 90mg
- Sodium: 800mg
- Carbohydrates: 40g
- Fiber: 3g
- Sugar: 3g
- Protein: 35g
- Prep Time: 15 minutes
- Cook Time: 20 minutes
- Category: Main Course
- Cuisine: American
FOLLOW ME in Pinterest for more recipes ideas
The Night Cheesy Garlic Chicken Wraps Changed My Dinner Routine
The first time I made Cheesy Garlic Chicken Wraps, it wasn’t planned. It was one of those nights when I stood in front of my fridge with no clue what to cook. I had a pack of chicken breasts, some shredded cheese, a few tortillas, and a head of garlic. Nothing fancy—just the usual staples. But when I started sautéing the garlic and seasoning the chicken, the aroma pulled me in. I decided to wrap it all up in tortillas, add a mix of cheeses, and toast them on a skillet until the outside was crispy and golden.
That first bite? Unbelievable. The melty cheese chicken wraps were creamy, garlicky, and full of flavor. I couldn’t believe something so simple could taste like something you’d find at a cozy café. I even texted a photo to my sister and said, “I think I just invented the ultimate comfort food.”
Now, these Cheesy Garlic Chicken Wraps are a regular in my kitchen. They’ve turned into more than just a quick dinner recipe—they’re my secret weapon for busy nights, last-minute guests, and even picky eaters. Whether you need an easy chicken dinner after work or something cozy on a weekend, this recipe never fails.
Ingredients Needed for Cheesy Garlic Chicken Wraps
Bringing these Cheesy Garlic Chicken Wraps to life starts with gathering the perfect combination of fresh ingredients. I’ve tested this recipe numerous times to find the ideal balance of flavors that create that ultimate comfort food experience we all crave.
For the Chicken Mixture:
2 tablespoons extra virgin olive oil
1½ pounds chicken breast, sliced into thin strips
5 garlic cloves, freshly minced
1 teaspoon Mediterranean herb blend
½ teaspoon smoky paprika
A pinch of chili flakes (customize to your spice tolerance)
Sea salt and cracked black pepper
1 sweet onion, thinly sliced into half-moons
1 red bell pepper, julienned
2 cups fresh spinach leaves (a nutritious addition that wilts perfectly)
For the Cheese Blend:
1½ cups shredded mozzarella
½ cup sharp cheddar, freshly grated
3 tablespoons cream cheese, brought to room temperature
2 tablespoons tangy sour cream
2 teaspoons fresh chives, finely chopped
For Wrap Assembly:
6 large flour tortillas (the freshest you can find)
1½ tablespoons melted butter
¾ teaspoon roasted garlic powder
Olive oil cooking spray for the perfect crisp finish
How to Make Cheesy Garlic Chicken Wraps Step-by-Step
Let me walk you through creating these mouthwatering Garlic Chicken Wraps step by step. I’ve refined this process through countless test batches in my kitchen to ensure you get perfect results every time.
1. Season and Cook the Chicken
1. Heat your large skillet over medium-high heat and add the olive oil until it begins to shimmer slightly.
2. While the pan heats, quickly toss your chicken strips with a pinch of salt and pepper in a bowl.
3. Carefully place the seasoned chicken in the hot pan, arranging in a single layer without overcrowding (work in batches if needed).
4. Allow the chicken to develop a golden crust by cooking undisturbed for about 3 minutes before flipping.
5. After flipping, cook for another 2-3 minutes until just cooked through. Transfer to a clean plate and tent loosely with foil to keep warm.
2. Create the Aromatic Vegetable Base
- In the same pan with all those flavorful chicken bits, add your sliced onions and cook for 2 minutes until they begin to soften and turn translucent.
- Add the fresh minced garlic and sauté for just 30 seconds until fragrant—be careful not to let it brown or it may become bitter.
- Sprinkle in the Mediterranean herb blend, smoky paprika, and chili flakes, stirring continuously to coat the onions and toast the spices slightly.
- Add the julienned bell peppers to the fragrant mixture and cook for 3 minutes, stirring occasionally until they begin to soften but still maintain some crispness.
- Return the chicken to the pan and toss everything together, allowing the flavors to meld for about 1 minute.
- Gently fold in the fresh spinach, stirring just until it begins to wilt from the residual heat—about 45 seconds. Remove from heat immediately.
3. Prepare Your Signature Cheese Blend
- In a medium bowl, combine your freshly grated mozzarella and cheddar cheeses.
- Take about ⅔ of this mixture and blend it with the room-temperature cream cheese and sour cream until well incorporated.
- Fold in the fresh chives, saving a few for garnish if desired.
- Reserve the remaining dry cheese mixture for sprinkling inside the wraps.
4. Prepare the Garlic-Butter Tortillas
- Whisk together the melted butter and roasted garlic powder in a small bowl.
- Lay your tortillas flat on your work surface and brush one side of each with this aromatic mixture.
- Flip the tortillas so the buttered side faces down—this will become the crispy exterior of your wrap.
5. Assemble with Care
- Working with one tortilla at a time, spread about 2 tablespoons of your creamy cheese mixture in the center, leaving a 2-inch border around the edges.
- Top with approximately ⅙ of your chicken-vegetable mixture, distributing it evenly.
- Sprinkle a generous tablespoon of the reserved dry cheese over the filling.
- Fold the bottom edge of the tortilla up over the filling, then fold in both sides, and continue rolling upward to create a secure package. The butter-garlic side should remain on the outside.
- Press gently to seal the wrap, then set aside seam-side down while you prepare the remaining wraps.
6. Achieve the Perfect Crispy Exterior
- Heat a clean, dry skillet over medium heat—no additional oil needed as the butter coating will prevent sticking.
- Place your assembled wraps seam-side down in the pan, working in batches to avoid crowding.
- Cook for 2-3 minutes until the bottom develops a golden-brown crust, then carefully flip.
- Cook for another 2 minutes on the second side until crispy and the cheese inside has begun to melt.
- For an even more melty interior, cover the pan with a lid during the last minute of cooking.
The finished wraps should have a satisfying crunch when you bite into them, giving way to the gooey, garlic-infused chicken filling inside. Slice diagonally to showcase the colorful interior and serve immediately for the ultimate comfort food experience.
Expert Tips/Variations for Garlic Chicken Wraps
After making these Garlic Chicken Wraps countless times in my kitchen, I’ve discovered several tricks and modifications that can elevate your experience. Here are my favorite insights to help you customize this recipe to your preferences and pantry availability.
My Signature Garlic Butter Glaze: The Secret That Sets These Wraps Apart
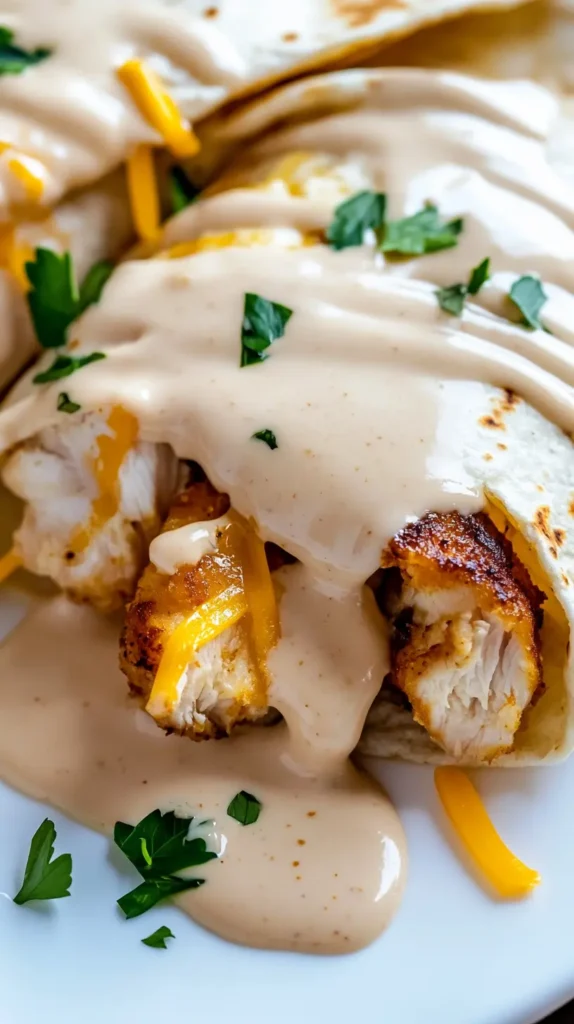
What really sets my Cheesy Garlic Chicken Wraps apart from every other easy chicken wrap recipe out there is one simple, flavorful trick: the signature garlic butter glaze I brush onto each tortilla before toasting. It’s a game-changer.
While most wraps rely on the filling alone, this buttery outer coating infuses every bite with rich roasted garlic flavor—and gives the tortilla that irresistible golden crunch. I make it with just melted butter, roasted garlic powder, and a pinch of sea salt, but the effect is pure magic. It transforms these homemade chicken wraps from good to restaurant-worthy.
I’ve tested this technique again and again, and it’s the one detail everyone comments on. It adds depth, aroma, and a gourmet finish without any extra work. Even picky eaters and wrap skeptics have said, “These are the best cheesy garlic chicken wraps I’ve ever had!” If you try nothing else, make sure you don’t skip this glaze—it’s the extra mile that makes all the difference.
This one special step is what makes my version of this comfort food dish stand out from every other garlic parmesan wrap recipe you’ll find online.
Pro Tips for Cheesy Garlic Chicken Wraps:
Prevent Soggy Wraps: Allow your chicken and vegetable mixture to cool for 5 minutes before assembling. This prevents excess moisture from making your tortillas soggy.
Cheese Selection Strategy: Pre-shredded cheese contains anti-caking agents that can affect melting. Whenever possible, grate your own cheese for the creamiest, most cohesive filling.
Tortilla Warming Technique: Briefly warm your tortillas for 10 seconds in the microwave before assembling.
Create a Flavor Base for Cheesy Garlic Chicken Wraps: For deeper flavor, deglaze the pan after cooking the chicken with 2 tablespoons of white wine or chicken broth, scraping up all those delicious browned bits before adding your vegetables.
Portion Control Secret: Use a 1/3 cup measuring cup as a scoop for your filling to ensure each wrap contains the same amount—this guarantees even cooking and consistent serving sizes.
Dietary Variations of Cheesy Garlic Chicken Wraps
Gluten-Free Adaptation: Substitute regular tortillas with corn tortillas or certified gluten-free wraps. Just be aware that corn tortillas are smaller, so you’ll likely need more of them and should reduce the filling accordingly.
Also Read : RED VELVET BROWNIES
Lower-Carb Option: Create lettuce wraps using large butter lettuce or romaine leaves instead of tortillas. The filling remains delicious, though you’ll skip the toasting step.
Vegetarian Transformation: Replace chicken with:
2 cups of sautéed portobello mushrooms, sliced
1 medium zucchini, diced and sautéed until just tender
1 cup of rinsed, drained chickpeas for protein
Dairy-Free Possibility: Use dairy-free cheese alternatives and plant-based cream cheese. Nutritional yeast (2 tablespoons) adds a wonderful cheesy flavor without actual cheese.
Flavor Variations to Explore
Mediterranean Twist: Add 1/4 cup chopped kalamata olives, 2 tablespoons sun-dried tomatoes, and substitute feta for half the cheese mixture.
Southwest Style: Incorporate 1 teaspoon cumin, 1/2 teaspoon coriander, 1/3 cup black beans, and 1/4 cup corn kernels. Serve with avocado slices and lime wedges.
Buffalo Chicken Version: Toss your cooked chicken in 3 tablespoons of buffalo sauce before assembling, and add 2 tablespoons crumbled blue cheese to your cheese mixture.
Breakfast Adaptation: Use scrambled eggs instead of chicken, add crispy bacon bits, and serve with a side of salsa for a morning variation that’s absolutely delightful.
Make-Ahead and Storage Solutions
Prep Components Separately: The chicken mixture and cheese blend can be prepared up to 2 days ahead and stored separately in the refrigerator, making assembly quick when you’re ready to eat.
Freezing Strategy: Assembled but untoasted wraps freeze beautifully for up to 3 months. Wrap each one individually in parchment paper, then foil, and place in a freezer bag. Thaw in the refrigerator overnight before toasting.
Reheating Method: To revive leftover wraps without sogginess, reheat them in a dry skillet over medium-low heat rather than the microwave. This restores their crispy exterior.
These variations and tips come from my personal kitchen experiments and family feedback. The beauty of this recipe lies in its flexibility, once you master the basic technique, you can adapt it endlessly to suit your taste preferences, dietary needs, and whatever ingredients you have on hand.
WHAT OTHER VARIATIONS CAN I MAKE?
My Cheesy Garlic Chicken Wraps Story: The First Bite That Changed My Dinner Game
One of the reasons I adore these Cheesy Garlic Chicken Wraps is their incredible versatility. The basic technique serves as a canvas for countless flavor combinations and adaptations. Let me share some inspired variations I’ve developed in my kitchen that transform this comfort food classic in exciting new directions.
Global Flavor Inspirations
Greek Island Twist : Transport your taste buds to the Mediterranean with these simple swaps:
Replace the Italian seasoning with 1 teaspoon dried oregano
Add ½ cup chopped marinated artichoke hearts to the vegetable mix
Incorporate ¼ cup crumbled feta into your cheese blend
Stir 2 tablespoons chopped Kalamata olives into the filling
Serve with a side of tzatziki for dipping
Fiesta Mexican Version: Create a south-of-the-border experience with these modifications:
Swap the Italian seasoning for 1 teaspoon each of cumin and chili powder
Add ⅓ cup black beans (rinsed and drained) to the filling
Mix ¼ cup roasted corn kernels into the vegetable mixture
Use pepper jack as part of your cheese blend for a spicy kick
Top with fresh cilantro and serve with guacamole and salsa
Asian-Inspired Adaptation: Reimagine the wrap with these Eastern flavors:
Marinate the chicken in 2 tablespoons soy sauce, 1 teaspoon sesame oil, and 1 tablespoon honey
Replace bell peppers with thinly sliced snow peas and water chestnuts
Add 1 tablespoon grated ginger and 1 teaspoon Chinese five-spice to the cooking process
Sprinkle with sesame seeds before serving
Offer a sweet chili dipping sauce on the side
The beauty of mastering these wraps is that once you understand the basic technique, you can let your creativity and pantry guide you to endless variations. I encourage you to experiment based on what’s in season, what your family enjoys, and what ingredients need to be used up in your refrigerator. Each variation brings its own unique character while maintaining that comforting combination of crispy exterior and gooey, flavorful filling.
Over the years, I’ve received numerous questions about these Cheesy Garlic Chicken Wraps from readers and friends alike. I’ve compiled the most common queries along with thorough answers to help you achieve wrap perfection every time.
Final Thoughts on These Cheesy Garlic Chicken Wraps
If there’s one recipe I’ll never get tired of making, it’s these Cheesy Garlic Chicken Wraps. They check every box: easy to prepare, full of flavor, endlessly customizable, and always satisfying. Whether you’re cooking for one, a hungry family, or prepping for the week ahead, this comfort food classic brings smiles to the table every single time. The creamy garlic cheese blend combined with tender chicken wrapped in a crispy tortilla delivers that melt-in-your-mouth experience you’ll crave again and again.
From their rich aroma to their golden, toasty finish, Cheesy Garlic Chicken Wraps are more than just an easy chicken dinner—they’re a warm hug on a plate. They work just as well for meal prep as they do for impressing guests. And the best part? You don’t have to be a professional chef to master them. This recipe has turned many “I’m-not-great-at-cooking” friends into confident home cooks, and I know it can do the same for you.
FAQs
u003cstrongu003eCan I prepare these wraps ahead of time?u003c/strongu003e
Absolutely! These wraps are perfect for meal prep in several ways:u003cbru003e. Prepare the chicken and vegetable filling up to 3 days ahead and store in an airtight container in the refrigerator.u003cbru003e. Mix the cheese blend up to 2 days in advance, keeping it covered and chilled.u003cbru003e. You can even assemble the entire wraps and store them uncooked, wrapped individually in parchment paper, for up to 24 hours before toasting.u003cbru003e. For longer storage, freeze the assembled but untoasted wraps for up to 3 months. . . . .Thaw overnight in the refrigerator before toasting for best results.
u003cstrongu003eMy wraps are falling apart during cooking. What am I doing wrong?u003c/strongu003e
This common issue has several simple fixes:u003cbru003e. Ensure you’re not overfilling the wraps—about ¾ cup total filling per 10-inch tortilla is ideal.u003cbru003e. Ensure your tortillas are soft and flexible. If they seem stiff, warm them for 10-15 seconds in the microwave before assembling.u003cbru003e. The cheese mixture acts as a u0022glueu0022 when it melts, so be sure to spread some near the edges of your tortilla.u003cbru003e. Always start cooking with the seam-side down to seal the wrap closed.u003cbru003e. Use toothpicks to secure particularly stubborn wraps during the first minute of cooking, then remove.
u003cstrongu003eHow can I make these wraps healthier without sacrificing flavor?u003c/strongu003e
I’ve tested several lightened-up versions that maintain the comfort food appeal:u003cbru003eSubstitute Greek yogurt for sour cream in the cheese mixtureu003cbru003e. Use reduced-fat cheese (though I recommend mixing with some full-fat for better melting)u003cbru003e. Increase the vegetable-to-chicken ratio by adding extra bell peppers and spinachu003cbru003e. Use whole wheat or high-fiber tortillas instead of regular flour tortillas .u003cbru003e. Brush tortillas with olive oil instead of butter for a different healthy fat profileu003cbru003e. Add extra herbs like cilantro, basil, or dill to boost flavor without additional caloriesu003cbru003e